A comprehensive step by step tutorial of building create-read-update-delete (CRUD) web application from scratch using MERN (Mongo, Express, React, Node.js) stack. One of the most popular web application stack based on Node.js is MERN stack. MERN is the abbreviation of MongoDB, Express.js, React.js, and Node.js, almost the same with the MEAN stack except MEAN stack using Angular and MERN stack using React. This basic step by step tutorial of MERN stack is building CRUD (Create-Read-Update-Delete) web application.
Table of Contents:
React can integrate with MERN stack as the front end that can access data from Express and MongoDB by consuming RESTful API. In this scenario of MERN Stack React will accessing data from Express and MongoDB by HTTP calls as default React component. We are using the same application for Express and React that run on the same IP and PORT. Before starting the tutorial, the following tools and framework are required:
We assume that you have already Installed Node.js and MongoDB. Make sure Node.js command line is working (on Windows) or runnable in Linux/OS X terminal. You can run MongoDB in the different terminal or command line.
1. MERN Stack: Install and Create React App
Open the terminal or Node.js command line then go to your MERN projects folder. We will install React app creator for creating a React app easily. For that, type this command.
sudo npm install -g create-react-app
Now, create a React app by type this command.
create-react-app mern-crud
This command will create a new React app with the name `mern-crud` and this process can take sometimes because all dependencies and modules also installing automatically. Next, go to the newly created app folder.
cd ./mern-crud
Now, run the React app for the first time using this command.
npm start
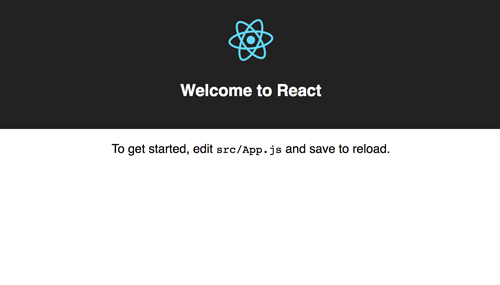
It will automatically open the default browser the point to `
http://localhost:3000`, so the landing page should be like this.
2. MERN Stack: Install and Configure Express.js
We have to replace the existing Node server that holds the default React application by Express.js as the backend. Stop the server by push keyboard Ctrl+C. Type this command to install Express.js and required dependencies.
npm install --save express body-parser morgan body-parser serve-favicon
Create a folder with the name "bin" and add a file with the name "www" on the root of the project.
mkdir bin
touch bin/www
Open and edit `bin/www` file then add this lines of codes.
#!/usr/bin/env node

/**
 * Module dependencies.
 */

var app = require('../app');
var debug = require('debug')('mean-app:server');
var http = require('http');

/**
 * Get port from environment and store in Express.
 */

var port = normalizePort(process.env.PORT || '3000');
app.set('port', port);

/**
 * Create HTTP server.
 */

var server = http.createServer(app);

/**
 * Listen on provided port, on all network interfaces.
 */

server.listen(port);
server.on('error', onError);
server.on('listening', onListening);

/**
 * Normalize a port into a number, string, or false.
 */

function normalizePort(val) {
  var port = parseInt(val, 10);

  if (isNaN(port)) {
    // named pipe
    return val;
  }

  if (port >= 0) {
    // port number
    return port;
  }

  return false;
}

/**
 * Event listener for HTTP server "error" event.
 */

function onError(error) {
  if (error.syscall !== 'listen') {
    throw error;
  }

  var bind = typeof port === 'string'
    ? 'Pipe ' + port
    : 'Port ' + port;

  // handle specific listen errors with friendly messages
  switch (error.code) {
    case 'EACCES':
      console.error(bind + ' requires elevated privileges');
      process.exit(1);
      break;
    case 'EADDRINUSE':
      console.error(bind + ' is already in use');
      process.exit(1);
      break;
    default:
      throw error;
  }
}

/**
 * Event listener for HTTP server "listening" event.
 */

function onListening() {
  var addr = server.address();
  var bind = typeof addr === 'string'
    ? 'pipe ' + addr
    : 'port ' + addr.port;
  debug('Listening on ' + bind);
}
Now, open and edit "package.json" then replace "start" value.
"scripts": {
  "start": "node ./bin/www",
  "build": "react-scripts build",
  "test": "react-scripts test --env=jsdom",
  "eject": "react-scripts eject"
}
Next, create "app.js" at the root of the project folder.
touch app.js
Open and edit app.js then add this lines of codes.
var express = require('express');
var path = require('path');
var favicon = require('serve-favicon');
var logger = require('morgan');
var bodyParser = require('body-parser');

var book = require('./routes/book');
var app = express();

app.use(logger('dev'));
app.use(bodyParser.json());
app.use(bodyParser.urlencoded({'extended':'false'}));
app.use(express.static(path.join(__dirname, 'build')));

app.use('/api/book', book);

// catch 404 and forward to error handler
app.use(function(req, res, next) {
  var err = new Error('Not Found');
  err.status = 404;
  next(err);
});

// error handler
app.use(function(err, req, res, next) {
  // set locals, only providing error in development
  res.locals.message = err.message;
  res.locals.error = req.app.get('env') === 'development' ? err : {};

  // render the error page
  res.status(err.status || 500);
  res.render('error');
});

module.exports = app;
Create routes for the book.
mkdir routes
touch routes/book.js
Open and edit “book.js" then add this lines.
var express = require('express');
var router = express.Router();

/* GET home page. */
router.get('/', function(req, res, next) {
  res.send('Express REST API');
});

module.exports = router;
Now, open and edit `src/registerServiceWorkers.js` then add to the register function this `fetch` event listener below `load` event listener.
window.addEventListener('fetch', (event) => {
  if ( event.request.url.match( '^.*(\/api\/).*$' ) ) {
    return false;
  }
});
So, the complete register function will look like this.
export default function register() {
  if (process.env.NODE_ENV === 'production' && 'serviceWorker' in navigator) {
    // The URL constructor is available in all browsers that support SW.
    const publicUrl = new URL(process.env.PUBLIC_URL, window.location);
    if (publicUrl.origin !== window.location.origin) {
      // Our service worker won't work if PUBLIC_URL is on a different origin
      // from what our page is served on. This might happen if a CDN is used to
      // serve assets; see https://github.com/facebookincubator/create-react-app/issues/2374
      return;
    }

    window.addEventListener('load', (event) => {
      const swUrl = `${process.env.PUBLIC_URL}/service-worker.js`;

      if (!isLocalhost) {
        // Is not local host. Just register service worker
        registerValidSW(swUrl);
      } else {
        // This is running on localhost. Lets check if a service worker still exists or not.
        checkValidServiceWorker(swUrl);
      }
    });

    window.addEventListener('fetch', (event) => {
      if ( event.request.url.match( '^.*(\/api\/).*$' ) ) {
        return false;
      }
    });
  }
}
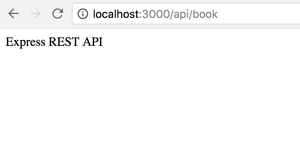
Now, check the configuration by running again the Node server that handles by Express now.
npm start
That means it works.
3. MERN Stack: Install and Configure Mongoose
The part of MERN stack is MongoDB, to get connected to MongoDB from Node.js application we are usually using Mongoose.js as MongoDB object modeling. On the terminal type this command after stopping the running Express server.
npm install --save mongoose bluebird
Open and edit `app.js` then add this lines after another variable line.
var mongoose = require('mongoose');
mongoose.Promise = require('bluebird');
mongoose.connect('mongodb://localhost/mern-crud', { useMongoClient: true, promiseLibrary: require('bluebird') })
  .then(() =>  console.log('connection succesful'))
  .catch((err) => console.error(err));
You can test the connection to MongoDB by run again the Node application and you will see this message on the terminal.
connection succesful
If you are still using built-in Mongoose Promise library, you will get this deprecated warning on the terminal.
(node:42758) DeprecationWarning: Mongoose: mpromise (mongoose's default promise library) is deprecated, plug in your own promise library instead: http://mongoosejs.com/docs/promises.html
That's the reason why we added `bluebird` modules and register it as Mongoose Promise library.
4. MERN Stack: Create Mongoose.js Model
Add a models folder on the root of the project folder for hold Mongoose.js model files.
mkdir models
Create a new Javascript file that uses for Mongoose.js model. We will create a model of Book collection.
touch models/Book.js
Now, open and edit that file and add Mongoose require.
var mongoose = require('mongoose');
Then add model fields like this.
var BookSchema = new mongoose.Schema({
  isbn: String,
  title: String,
  author: String,
  description: String,
  published_date: { type: Date },
  publisher: String,
  updated_date: { type: Date, default: Date.now },
});
That Schema will mapping to MongoDB collections called book. If you want to know more about Mongoose Schema Datatypes you can find it
here. Next, export that schema.
module.exports = mongoose.model('Book', BookSchema);
5. MERN Stack: Create Routes for Accessing Book Data via Restful API
Open and edit again "routes/book.js” then replace all codes with this.
var express = require('express');
var router = express.Router();
var mongoose = require('mongoose');
var Book = require('../models/Book.js');

/* GET ALL BOOKS */
router.get('/', function(req, res, next) {
  Book.find(function (err, products) {
    if (err) return next(err);
    res.json(products);
  });
});

/* GET SINGLE BOOK BY ID */
router.get('/:id', function(req, res, next) {
  Book.findById(req.params.id, function (err, post) {
    if (err) return next(err);
    res.json(post);
  });
});

/* SAVE BOOK */
router.post('/', function(req, res, next) {
  Book.create(req.body, function (err, post) {
    if (err) return next(err);
    res.json(post);
  });
});

/* UPDATE BOOK */
router.put('/:id', function(req, res, next) {
  Book.findByIdAndUpdate(req.params.id, req.body, function (err, post) {
    if (err) return next(err);
    res.json(post);
  });
});

/* DELETE BOOK */
router.delete('/:id', function(req, res, next) {
  Book.findByIdAndRemove(req.params.id, req.body, function (err, post) {
    if (err) return next(err);
    res.json(post);
  });
});

module.exports = router;
Run again the Express server then open the other terminal or command line to test the Restful API by type this command.
curl -i -H "Accept: application/json" localhost:3000/api/book
If that command return response like below then REST API is ready to go.
HTTP/1.1 200 OK
X-Powered-By: Express
Content-Type: application/json; charset=utf-8
Content-Length: 2
ETag: W/"2-l9Fw4VUO7kr8CvBlt4zaMCqXZ0w"
Date: Sat, 28 Oct 2017 22:39:59 GMT
Connection: keep-alive
Now, let's populate Book collection with initial data that sent from RESTful API. Run this command to populate it.
curl -i -X POST -H "Content-Type: application/json" -d '{ "isbn":"1783551623, 9781783551620","title":"React.js Essentials: A Fast-paced Guide to Designing and Building Scalable and Maintainable Web Apps With React.js","author": "Artemij Fedosejev","description":"A fast-paced guide to designing and building scalable and maintainable web apps with React.js.","published_date":"2015-08-27T16:00:00Z","publisher":"Packt Publishing" }' localhost:3000/api/book
You will see this response on the terminal if success.
HTTP/1.1 200 OK
X-Powered-By: Express
Content-Type: application/json; charset=utf-8
Content-Length: 459
ETag: W/"1cb-G9luzsvo07EKg3s00VUyB19WpA4"
Date: Thu, 02 Nov 2017 00:01:22 GMT
Connection: keep-alive

{"__v":0,"isbn":"1783551623, 9781783551620","title":"React.js Essentials: A Fast-paced Guide to Designing and Building Scalable and Maintainable Web Apps With React.js","author":"Artemij Fedosejev","description":"A fast-paced guide to designing and building scalable and maintainable web apps with React.js.","published_date":"2015-08-27T16:00:00.000Z","publisher":"Packt Publishing","_id":"59fa6052e245b0060c9aa5d5","updated_date":"2017-11-02T00:01:22.058Z"}
6. MERN Stack: Add React Router DOM
Our front end consists of Booklist, detail, create and edit. For navigating between that component, we need to create a route. First, install modules that required by the components.
npm install --save react-route-dom
npm install --save-dev bootstrap
npm install --save axios
Next, open and edit `src/index.js` then replace all codes with this.
import React from 'react';
import ReactDOM from 'react-dom';
import { BrowserRouter as Router, Route } from 'react-router-dom';
import '../node_modules/bootstrap/dist/css/bootstrap.min.css';
import '../node_modules/bootstrap/dist/css/bootstrap-theme.min.css';
import './index.css';
import App from './App';
import registerServiceWorker from './registerServiceWorker';
import Edit from './components/Edit';
import Create from './components/Create';
import Show from './components/Show';

ReactDOM.render(
  <Router>
      <div>
        <Route exact path='/' component={App} />
        <Route path='/edit/:id' component={Edit} />
        <Route path='/create' component={Create} />
        <Route path='/show/:id' component={Show} />
      </div>
  </Router>,
  document.getElementById('root')
);
registerServiceWorker();
You see that Edit, Create and Show added as the separate component. Bootstrap also included in the import to make the views better. Now, create the new edit, create and show files.
mkdir src/components
touch src/components/Create.js
touch src/components/Show.js
touch src/components/Edit.js
7. MERN Stack: Add List of Book to Existing App Component
As you see in the previous step that App component act as home or root page. This component handles the list of books. Open and edit `src/App.js` then replace all codes with this codes.
import React, { Component } from 'react';
import ReactDOM from 'react-dom';
import { Link } from 'react-router-dom';
import axios from 'axios';

class App extends Component {

  constructor(props) {
    super(props);
    this.state = {
      books: []
    };
  }

  componentDidMount() {
    axios.get('/api/book')
      .then(res => {
        this.setState({ books: res.data });
        console.log(this.state.books);
      });
  }

  render() {
    return (
      <div class="container">
        <div class="panel panel-default">
          <div class="panel-heading">
            <h3 class="panel-title">
              BOOK CATALOG
            </h3>
          </div>
          <div class="panel-body">
            <h4><Link to="/create"><span class="glyphicon glyphicon-plus-sign" aria-hidden="true"></span> Add Book</Link></h4>
            <table class="table table-stripe">
              <thead>
                <tr>
                  <th>ISBN</th>
                  <th>Title</th>
                  <th>Author</th>
                </tr>
              </thead>
              <tbody>
                {this.state.books.map(book =>
                  <tr>
                    <td><Link to={`/show/${book._id}`}>{book.isbn}</Link></td>
                    <td>{book.title}</td>
                    <td>{book.author}</td>
                  </tr>
                )}
              </tbody>
            </table>
          </div>
        </div>
      </div>
    );
  }
}

export default App;
8. MERN Stack: Add Create Components for Add New Book
For add a new book, open and edit `src/components/Create.js` then replace all codes with this codes.
import React, { Component } from 'react';
import ReactDOM from 'react-dom';
import axios from 'axios';
import { Link } from 'react-router-dom';

class Create extends Component {

  constructor() {
    super();
    this.state = {
      isbn: '',
      title: '',
      author: '',
      description: '',
      published_year: '',
      publisher: ''
    };
  }
  onChange = (e) => {
    const state = this.state
    state[e.target.name] = e.target.value;
    this.setState(state);
  }

  onSubmit = (e) => {
    e.preventDefault();

    const { isbn, title, author, description, published_year, publisher } = this.state;

    axios.post('/api/book', { isbn, title, author, description, published_year, publisher })
      .then((result) => {
        this.props.history.push("/")
      });
  }

  render() {
    const { isbn, title, author, description, published_year, publisher } = this.state;
    return (
      <div class="container">
        <div class="panel panel-default">
          <div class="panel-heading">
            <h3 class="panel-title">
              ADD BOOK
            </h3>
          </div>
          <div class="panel-body">
            <h4><Link to="/"><span class="glyphicon glyphicon-th-list" aria-hidden="true"></span> Book List</Link></h4>
            <form onSubmit={this.onSubmit}>
              <div class="form-group">
                <label for="isbn">ISBN:</label>
                <input type="text" class="form-control" name="isbn" value={isbn} onChange={this.onChange} placeholder="ISBN" />
              </div>
              <div class="form-group">
                <label for="title">Title:</label>
                <input type="text" class="form-control" name="title" value={title} onChange={this.onChange} placeholder="Title" />
              </div>
              <div class="form-group">
                <label for="author">Author:</label>
                <input type="text" class="form-control" name="author" value={author} onChange={this.onChange} placeholder="Author" />
              </div>
              <div class="form-group">
                <label for="description">Description:</label>
                <textArea class="form-control" name="description" onChange={this.onChange} placeholder="Description" cols="80" rows="3">{description}</textArea>
              </div>
              <div class="form-group">
                <label for="published_date">Published Date:</label>
                <input type="number" class="form-control" name="published_year" value={published_year} onChange={this.onChange} placeholder="Published Year" />
              </div>
              <div class="form-group">
                <label for="publisher">Publisher:</label>
                <input type="text" class="form-control" name="publisher" value={publisher} onChange={this.onChange} placeholder="Publisher" />
              </div>
              <button type="submit" class="btn btn-default">Submit</button>
            </form>
          </div>
        </div>
      </div>
    );
  }
}

export default Create;
9. MERN Stack: Add Show Component for Show Book Details
To show book details that listed on the home page, open and edit `src/components/Show.js` then add this lines of codes.
import React, { Component } from 'react';
import axios from 'axios';
import { Link } from 'react-router-dom';
class Show extends Component {
constructor(props) {
super(props);
this.state = {
book: {}
};
}
componentDidMount() {
axios.get('/api/book/'+this.props.match.params.id)
.then(res => {
this.setState({ book: res.data });
console.log(this.state.book);
});
}
delete(id){
console.log(id);
axios.delete('/api/book/'+id)
.then((result) => {
this.props.history.push("/")
});
}
render() {
return (
<div class="container">
<div class="panel panel-default">
<div class="panel-heading">
<h3 class="panel-title">
{this.state.book.title}
</h3>
</div>
<div class="panel-body">
<h4><Link to="/"><span class="glyphicon glyphicon-th-list" aria-hidden="true"></span> Book List</Link></h4>
<dl>
<dt>ISBN:</dt>
<dd>{this.state.book.isbn}</dd>
<dt>Author:</dt>
<dd>{this.state.book.author}</dd>
<dt>Description:</dt>
<dd>{this.state.book.description}</dd>
<dt>Publish Date:</dt>
<dd>{this.state.book.published_year}</dd>
<dt>Publisher:</dt>
<dd>{this.state.book.publisher}</dd>
</dl>
<Link to={`/edit/${this.state.book._id}`} class="btn btn-success">Edit</Link>
<button onClick={this.delete.bind(this, this.state.book._id)} class="btn btn-danger">Delete</button>
</div>
</div>
</div>
);
}
}
export default Show;
In this component, there is two button for edit current book and for delete current book. Delete function included in this component.
10. MERN Stack: Add Edit Component for Edit a Book
After the show book details, we need to edit the book. For that open and edit, `src/components/Edit.js` then add this lines of codes.
import React, { Component } from 'react';
import axios from 'axios';
import { Link } from 'react-router-dom';

class Edit extends Component {

  constructor(props) {
    super(props);
    this.state = {
      book: {}
    };
  }

  componentDidMount() {
    axios.get('/api/book/'+this.props.match.params.id)
      .then(res => {
        this.setState({ book: res.data });
        console.log(this.state.book);
      });
  }

  onChange = (e) => {
    const state = this.state.book
    state[e.target.name] = e.target.value;
    this.setState({book:state});
  }

  onSubmit = (e) => {
    e.preventDefault();

    const { isbn, title, author, description, published_year, publisher } = this.state.book;

    axios.put('/api/book/'+this.props.match.params.id, { isbn, title, author, description, published_year, publisher })
      .then((result) => {
        this.props.history.push("/show/"+this.props.match.params.id)
      });
  }

  render() {
    return (
      <div class="container">
        <div class="panel panel-default">
          <div class="panel-heading">
            <h3 class="panel-title">
              EDIT BOOK
            </h3>
          </div>
          <div class="panel-body">
            <h4><Link to={`/show/${this.state.book._id}`}><span class="glyphicon glyphicon-eye-open" aria-hidden="true"></span> Book List</Link></h4>
            <form onSubmit={this.onSubmit}>
              <div class="form-group">
                <label for="isbn">ISBN:</label>
                <input type="text" class="form-control" name="isbn" value={this.state.book.isbn} onChange={this.onChange} placeholder="ISBN" />
              </div>
              <div class="form-group">
                <label for="title">Title:</label>
                <input type="text" class="form-control" name="title" value={this.state.book.title} onChange={this.onChange} placeholder="Title" />
              </div>
              <div class="form-group">
                <label for="author">Author:</label>
                <input type="text" class="form-control" name="author" value={this.state.book.author} onChange={this.onChange} placeholder="Author" />
              </div>
              <div class="form-group">
                <label for="description">Description:</label>
                <input type="text" class="form-control" name="description" value={this.state.book.description} onChange={this.onChange} placeholder="Description" />
              </div>
              <div class="form-group">
                <label for="published_date">Published Date:</label>
                <input type="number" class="form-control" name="published_year" value={this.state.book.published_year} onChange={this.onChange} placeholder="Published Year" />
              </div>
              <div class="form-group">
                <label for="publisher">Publisher:</label>
                <input type="text" class="form-control" name="publisher" value={this.state.book.publisher} onChange={this.onChange} placeholder="Publisher" />
              </div>
              <button type="submit" class="btn btn-default">Submit</button>
            </form>
          </div>
        </div>
      </div>
    );
  }
}

export default Edit;
11. MERN Stack: Run the MERN App
Now, we can test our completed app by type this command.
npm run build
npm start
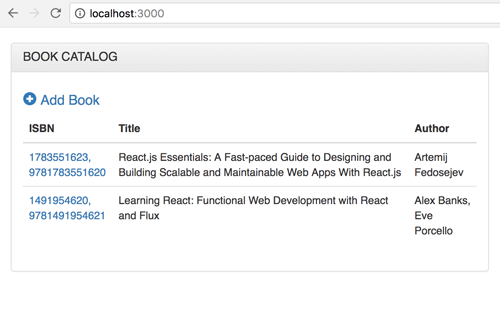
On the browser go to `localhost:3000` then you will see this home page.
You can navigate and populate the books data.